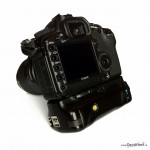
 I’ve had the idea of embedding a computer DSLR camera for a couple of years now, but for whatever reason I never got around to implementing it, mostly due to the cost of small single board computers. Until now, that is. With the release of the Raspberry Pi, embedded computing has all of a sudden become much more affordable. At €35 for the computer, it’s far cheaper than any of it’s rivals.
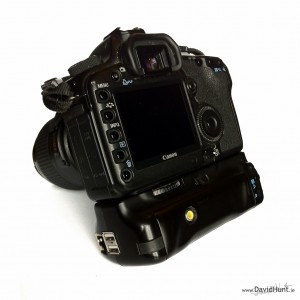
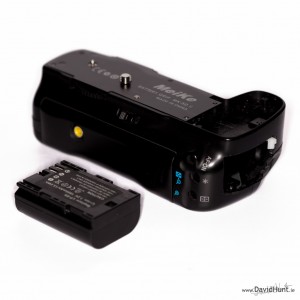
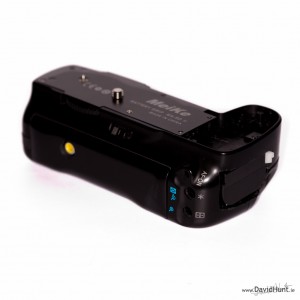
So what I’ve done is take an old (broken) battery grip that I had lying around (for my Canon 5D Mark II), and made a few modifications to it so I could fit the Raspberry Pi SBC (Single Board Computer) into it.
The result is what I call “Camera Pi”. 🙂
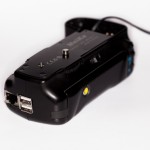
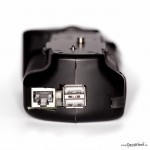
I left a few holes in the case so that I could get at the USB and network ports, and video port. it’s a fully functioning computer with a Linux Operating System (Raspbian), has 2 USB, network, video, HDMI and GPIO.
Possibilities include:
- Wireless tethered shooting – attach a Wifi dongle to the USB port, so I can transmit pictures to a PC or tablet PC as I’m shooting.
- Attach a USB memory key or hard drive so I can back up the images on the camera.
- Remote control the camera using a PC, tablet PC or smartphone (from anywhere in the world).
- Intervalometer – take a picture every few seconds for those high-speed sunset sequences, including exposure adjustment as you go.
- On-the-fly image conversion for faster previews on remote display device (iPad, etc).
- Add a small LCD display to give status, allow user input via buttons, etc.
- Trigger camera via shutter release port, also allows waking up of sleeping camera, which cant be done via USB.
 |
 |
 |
There’s plenty of work to be done on the software side of things but the prototype is working. I can pull images from the camera and transmit them via either Wifi or ethernet. There’s a significant problem with the current USB drivers on the Raspbian linux disribution, though. After a few requests to the camera, the gphoto app responds with “Unknown Error”, and the only solution seems to be to unplug the usb cable and re-insert it. Not a workable solution, so I’ll have to look into that. Works fine on my other linux box, but a full-sized PC won’t fit into the battery grip! 🙂
–Note– I found a wee ‘C’ code snippet that will reset a USB port, and that seems to do the trick if I call it between each gphoto2 call. Not ideal, but it gets me away from constantly unplugging the cable….
 |
 |
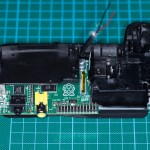 |
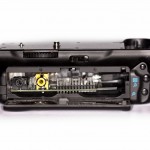
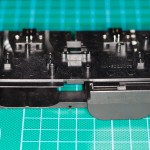
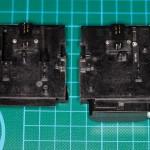
The first pic of the three shows the original double compartment. Next shows the compartment split in two, and the third shows the compartment mounted in the grip with the Rasberry Pi. There’s just enough room above the Pi to mount the DC-DC converter, and the final result is shown below.
Update on 16th Aug 2012
I spent a few hours this evening putting together a perl script for tethering, and I now have it working. The script queries the camera for images every second, and gets a list of images. It compares against a list of already download images, gets the new ones, then sends them to my iPad which is running shuttersnitch. I can press the shutter on the camera, which is not affected by the gphoto2 queries from the Pi, and a second or two later the Pi takes the image from the camera into the Pi. Then the image is transmitted to the iPad. If there’s an interruption between the Pi and the Camera, the Pi will transfer all images that it has not previously transferred before when communications are re-established. Here’s a quick video demo:
[embedplusvideo height=”281″ width=”450″ standard=”http://www.youtube.com/v/XIfsNnEkzto?fs=1″ vars=”ytid=XIfsNnEkzto&width=450&height=281&start=&stop=&rs=w&hd=0&autoplay=0&react=1&chapters=¬es=” id=”ep5228″ /]
Update on 18th Aug 2012
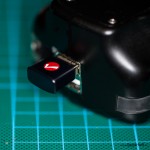
I popped into my local electronics superstore this morning, and picked up an 802.11n WiFi Dongle. Nice and small, about 10mm square. I’ll post pics of it later. Suffice to say, the Raspberry Pi is now associated to my 802.11b router, and pulling down new packages as we speak. It’s based on the Realtek RTL8188SU chipset, so should be good for a wifi hotspot. So, that’s another milestone achieved! 🙂
Also, I’m blown away by the interest in the project, nice to see! And lots of positive comments! 🙂
Update on 19th Aug 2012
Main news for today is that I got the camera triggered via shutter relase cable from the GPIO pins on the Raspberry Pi. I built a circuit that will allow me to trigger both pins on the shutter release port. While this may not seem significant, it allows me to wake up the camera if it goes to sleep by sending a pulse to the “half depress” pin on the shutter release port. So now I’ve two methods to take a picture, one via the USB, and the other via the Shutter Release port.
Oh, and I also got a quick script done to do a 5-exposure bracketed shot, -4, -2, 0, +2 +4. 🙂
Next to play with more tethering… or USB-key backups… There’s so much to do… 🙂
More to come….
Parts List (so far):
- Raspberry Pi – €35
- Battery Grip – €35
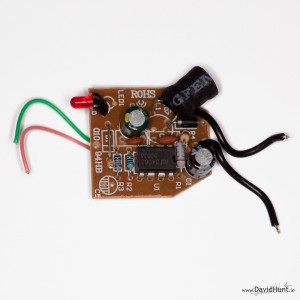
- 7-12V to 5V DC-DC converter (probably about €10, I had one lying around)
- 7.2v 1800mAh battery (£9.99 from 7dayshop.com)
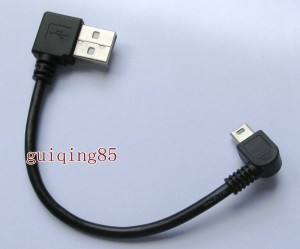
- 15cm USB cable €4
- 802.11n WiFi Dongle €20 (much cheaper on eBay, though)
Raspberry Pi is a trademark of the Raspberry Pi Foundation
About the Author:
By day I’m a senior embedded Linux software engineer. In my spare time, I take pictures, and play with gadgets and technology. 🙂
Twitter: https://twitter.com/climberhunt @climberhunt #CameraPi
Facebook: https://www.facebook.com/davidhuntphotography
Other interesting DIY projects:
- Macro Pi – Focus Stacking using Raspberry Pi
- Water Droplet Photography with Raspberry Pi
- Tri-flash – three strobes on one mount
- Infiniband at Home (10Gb networking on the cheap)
- Lapse Pi – Time Lapse rail using Raspberry Pi
Very interesting Dave. A live backup to a mobile device over an ad-hoc wireless network would be of great interest to all photographers while on the job. Looking forward to hearing more about this!
Nice work – how about opensourcing the hardware design so that I or others could try the same with Nikon/Pentax/…. ?
Hi, Everything in there is off-the shelf. This will work with any camera that is compatible with the gphoto2 library. 1400 cameras, at the latest count… http://gphoto.org/proj/libgphoto2/support.php
Rgds,
Dave.
You mentioned adding an lcd screen to the grip, but what about using the existing lcd screen on the camera? Like somehow override the display inputs from the camera and have it display the video output from the pi. That would be the most elegant solution and a real technical accomplishment…
Nice! I’m looking into doing something similar. Nice use of the battery grip. I hadn’t thought of that.
That is a brilliant idea! Very interested to see what you do with it.
“SHUT UP AND TAKE MY MONEY!”
Seriously. Being able shoot via wifi straight to a linux mounted disk is a Dream Come True!
We just put up a project on kickstater that does this and more:
http://kck.st/N9vw9t
Once you get these ideas pushed into a nice, working model, I recommend turning it into a Kickstarter project! At a base cost to you of about $100 (as is) you could easily sell for a 50% profit and if you sourced your supplies from a bulk distributor you could increase your profits without raising your price.
Seriously, this is an amazing project. Photographers of all levels would love to have something like this. Myself included. 🙂
You are going to be very busy very soon. Canon EOS system how soon and how to obtain one. I would like to shoot from a computer with the camera in a different location. I hope you get rich!
Looks great! I guess you could use a 7850 to get to the 5V, couldn’t you? Would be cheaper and smaller.
Great Idea!
You are a genius! I can’t wait till your project is finish!
A way cooler plan than my raspberry Pi build. I was just going to make a memory card dumping station. Any access to the HDMI port? What software are you using to shoot tethered?
Thomas,
I’m using gphoto2 for the camera control and image download.
Rgds,
Dave.
One word. Kickstarter.
Kickstarter was exactly what I was thinking. Would give enough purchasing power to cut the price of parts in half.
the pi is already as cheap as its going to be seeing as its made by a non profit. He might be able to get a bulk deal on the battery.
This could get even more interesting for Canon P&S cameras that run CHDK and use the CHDK ptp interface. There are already rasp-pi’s working with CHDK via ptp. This makes for a really nice h/w build to take advantage of that..
You could always use a laptop and ssh over wifi, ssh -Y pi@ will give you X forwarding, it gives you options, so you can set it up entirely remotely somewhere.
david hunt. this will make an immense difference to people with eos dslrs upto 400~450d/40d/5dc. all these run vxworks, which can interface seamlessly with linux at the dslr os level. cs
This is pretty awesome. If you get this into production it will sell like hotcakes!!
Thanks for the kind comments all! I really appreciate them.
Video added with tethering demo sending images to iPad…
Get in touch with guys from Magic Lantern, you could cooperate with them and make this project become solid.
http://www.magiclantern.fm/forum/index.php
😉
I want to have your baby ;-} Seriously brilliant!
Let me know when I can order one from you.
It should be in every camera bag….
Love the innovation.
Good for you.
LOL! This really made me laugh! Thanks for the comment!
This smells like an amazing Kickstarter project to me.
The platform should be useful and the same for every Canon camera (hopefully for Nikon as well).
The possibilities are endless and the form factor is fantastic.
Kudos on your ingenuity.
Would this approach work with the original Canon 5D? I just connect the Pi to my camera with the USB cable?
Thanks.
Yup, should work with all the models of camera supported by gphoto2. And that’s a long list! 😉
OK, I’ve got my Raspberry Pi connected by USB to a Canon 5D, however when I run: gphoto2 -L
I get errors: Error (-60: ‘Could not lock the device’)
Any debug help is appreciated.
AMAZING IDEA.
Keep up the good work, you’re really ahead 😉
This is great – hope you make your millions out of it 🙂 Just a request, can you make it find my keys as well?
Congrats.
WiFi now working. :). See article for update…
Exactly what I have wanted for so long. I recently found the magic lantern firmware for my camera, a 600D, and that opened up my camera leaps and bounds. This just made my day. Will you be making the scripts and such available?
excellent work!
and rather cheaper than the Canon WFT-E4 IIA Wireless File Transmitter (WFT) for the 5Dmk2 ($674.95 at B&H just now!)
This smells like a future Kickstarter project… I’d be the first to preorder one, if you do make it available.
I’m working on a photography related Raspberry Pi project. My goal it to have the RPi control my Nikon D40 to capture 5 brackets images- 0, -2EV, +2EV, -4EV,4EV – for later use in created HDR images. My D40 does not have auto-bracketing.
I’m at the point where I have thing working but the solution is rather kludgy.
Well done, interesting what you are doing, keep us informed (photographer South Africa)
GPIO pins now able to trigger the camera. 🙂
I wonder how much more functionality you could leverage with 2 way comunication? That is calling MagicLantern firmware operations in the camera, to access Canon image rendering.
Can you provide some guidance on which pins might be useful? Are there any libraries for detecting the signal on the PINS?
Khurt,
Very good video here:
http://www.youtube.com/watch?v=q_NvDTZIaS4
Rgds,
Dave
Thank you. I’ve got my project up and working but will take a look at using the GPIO.
http://islandinthenet.com/2012/08/23/hdr-photography-with-raspberry-pi-and-gphoto2/
A good alternative to the Raspberry Pi for these kind of projects are OpenWrt-supported consumer “routers”. For example; the TP-Link TL-MR3020 is really cheap and has USB and Wi-Fi: http://wiki.openwrt.org/toh/tp-link/tl-mr3020#internal.pictures
I don’t think a wifi router with a USB port is an alternative. Because it will just provide a remote USB port (over wifi) for a Linux or Windows machine. Unless there is DSLR USB drivers already built for iphone or android os.
Hi Chris,
I’m looking into this, but not sure if it works even though the T-link is the core of CamRanger. The canon is linked to T-link by USB, don’t know if Ipad can see it unless there is a driver for Ipad or android. Did you try it ?
Nice! I’m looking into doing something similar. Could you say more about the 802.11n WiFi Dongle ? as I’m looking for WiFi to my RPi.
Thanks.
I have been thinking of something similar. I have a Zune that I have not used for sometime (I stream from my PC to my iPhone and iPad) and was thinking that since it has a screen, battery, and 80 GB drive that maybe we can open it up and figure out how to adapt it to the Pi. Any thoughts to share would be great. (I plan on ordering a Pi soon).
Hi Dave,
well done!
It looks very cool!
I could see something like this having commercial usage 🙂
e.g. a security camera….which is remotely controlled & off site backed up
regards,
Dave
This is amazing! A great use for the Raspberry Pi.
Great idea! I have been looking for a justification to buy a Raspberry Pi. Of course it wasn’t the cost that put me off getting one but the thought of how much time I would waste playing with it. Now I can tell myself that it’s not just playing but has a concrete goal.
I have always thought that the Canon WRT-xx devices are wildly overpriced & this looks like a decent alternative.
Great work David! You should look into using lighttpd and php to develop a small UI. Can definitely call gPhoto CLI from php or cgi (any web interface). Also rsync works great for file transfer
What, you could have used a gumstix, they are smaller you know. I’m tempted to build one for a friend, and i’ll use a gumstix.
I think the gumstix might turn out to be a little bit more expensive than a Raspberry Pi. The Pi cost me €33, includes 2 usb, network, composite, hdmi ,and GPIO. It’s a pretty sweet board for the money. It’s a tight squeeze, but it fits ok. 🙂 Thanks for the comment!
fabulous. when you get your thing working for Nikon D5100 i am buying. kickstarter indeed. i will contribute as long as there is a plan to move to Nikon, too. what a great job!
Gary. the gphoto library I’m using supports 1400 different cameras, including a range of Nikons, so that shouldn’t be a problem! 🙂
thanks for the instant reply. you are going to be a wealthy man someday and i want a piece!!
Oh yeah!! This is a very good advance!! Congratulations!!
Realy, realy great job done.
I intend to build one for my canon d550/t2i
( if you don’t mind 😉 ), but i’m not familiar with perl. Can’t you open your script(s) for download?
@ojanssen,
you should measure your battery grip at first, as the 550d grip is smaller than the one of the 5d mk2. I measured my 60d grip (which is probably sized in between) and a raspberry pi won’t fit inside 🙁
I also tried gphoto2 on my Raspberry with a Canon 1000D and face sever issues with the USB. If I do the same on my pc running Ubuntu 12.04, it works fine without any USB issues. On the Raspberry the only command which works is the “gphoto2 –auto-detect”, but I have to reset the USB after one run. If I try other commands like “gphoto2 –get-all-files”, it fails (and USB is gone again). One strange thing I onserved is that the USB device number increases after each gphoto-command.
Since gphoto and camera work fine under Ubuntu, I assume that the issue is either the Raspberry or the gphoto-arm-version.
On Raspberry the gphoto2 version is 2.4.14 and on Ubuntu it’s 2.4.11 (both use libgphoto2_port 0.8.0).
Just had an idea which helped a bit: I was working on another user account and need to use “sudo” to capture fotos. With the default accout “pi” this is not necessary.
Now I have “only” the USB port reset issue left…. (for both accounts).
@tgx
thanks for the hint, but i just managed to put the raspi in a grip wich i had to empty a lot but it fits in there realy tight.
sadly there is no room for an integrated battery, so i had to place mine outside the grip, but that’s ok for me.
had the problem with resetting the USB-port, but i’ll keep working on it. till now gphoto2 works fine with the 550d.
Great job David, I’m working on a project to perform remote shooting, works well from a dev laptop using gphoto2 to take the picture then an ftp job to server indoors. Trouble I have is with the rPi and gphoto2, drops the connection, same as you mentioned. I too found the USB reset code which makes the connection a little more stable but I still only get 50% of the pictures I programmed for. Using a Canon 1000D which I think is different software. Did you ever find a stable solution to the problem?
This looks great! Can’t wait to see the final product, have you considered including GPS and have the computer link the file and GPS co-ordinates?
I was going to ask about GPS too, but the other way around. Does gphoto2 include the necessary PTP commands to take advantage of the new EOS 7D firmware which allows images to be geotagged via USB? If so, this little project could replace both the Canon WFT-E5 and the GP-E2 in one box, and save over €700 in the process! Throw in a couple of optional sensors on the GPIO pins to trigger on sound/vibration/etc. and you have the “Ultimote” accessory. Nice job, keep up the good work.
This is revolutionary… you have opened the gateway to marrying embedded devices with proprietary professional line cameras. You’re probably the camera manufacturer’s worst nightmare (assuming they labor under the illusion the proprietary standards maximize their profits), but your work here answers the lingering “what if” that many have been dreaming about.
Now, the first major camera manufacturer, e.g. Nikon or Canon, will realize this is an opportunity to embrace, they’ll open up their architecture and welcome the open source community to integrate with their product lines while still keeping their focus on what what they do best: making cameras and lenses.
Bravo!!
Great idea!!
Hope you get this commercialized!
Greetz
Willem de Leeuw
Great idea. Any chance you could upload your perl script, and any tips on getting gphoto2 to play better with the Raspbian build?
Well done for a brilliant project!
Is there enough space to fit a large-capacity flash drive (with or without housing) inside the grip too. Would be awesome to have say 128GB of on-the-fly backup storage.
Dan, You could use a 128Gig as the main SD card with the OS, using it as a buffer for when you attach external storage, at which stage it gets flushed out externally and then cleared from the Pi SD card….
Ah, I didn’t realise the Pi has onboard storage capability. That would definitely do the trick, and would be cheaper than a USB flash drive.
Bet you’ve seen your site hits go through the roof since you posted this. Very exciting development. Hope you consider the Kickstarter suggestions, it’d get a whole lot of backing, and could be a great side business to your photography endeavours.
Good Luck!
Man just when you thought DIY couldn’t get any cooler!
Dave, There are some recent and in progress raspian updates and special settings around USB you may want to track.
http://www.raspberrypi.org/phpBB3/viewtopic.php?f=28&t=12097&start=375
The USB port reset is a smart tweek in the meantime.
Hello,
do U think about RassberryPi + WiFi ?
U will have a replacement to expensive canon grip .
P.
Yes, I have it working same as video demo, but with wifi. Working on hotspot now.
Really nice work. You got it working with wifi, this is brilliant. Because of the power of the PI board would it be possible to do HD video encoding from DSLR cameras or high end hd-sdi outputs to iPad or any other wifi device? i figure this would be of huge benifit. Specially for commercial film production or Internet live casts…. Would love to see something like this..
Excellent work! 🙂 According the the Raspberry Pi FAQ, you should be able to power the Pi directly from 4 x AAs without the DC-DC conversion, although I daresay you would get longer life from the camera battery.
Seriously speaking, you HAVE to start a Kickstarter projectfor this and turn it into a real addition before Canon or someone else does!
Please stop all this obsession with Kickstarter Are you people so lazy that you just want to get this served up on a plate rather than doing the work yourselves? The whole point of the Raspberry Pi project is to encourage programming & experimentation.
Sadly while David has piqued everybody’s interest he hasn’t actually shared any of the details of programming or scripts that he is using despite being asked several time. Happily Khürt Williams has been gracious enough to share his work http://islandinthenet.com/2012/08/23/hdr-photography-with-raspberry-pi-and-gphoto2/
Not really a fair comment, Nigel. Scripts are very much at the early stages, and I’m focussing on hardware at the moment, GPIO, switches, transistors to drive things, etc. I will share what I can, when I can.
Dave,
Sorry, I apologise for doubting you but I was hoping for a co-operative Open Source project in the manner of Magic Lantern rather than all these calls for you to make your fortune with a Kickstart project by serving everything up on a plate. I have just bought a Raspberry Pi & have an 5D2 battery grip that I no longer use so could contribute but it seems a bit pointless to reinvent the wheel if you have already made progress.
Very interesting work Dave,
Do you think this idea could be tweaked so that it would be possible to control multiple cameras and download the images to a USB connected PC / Mac ?
Wow, this is really great! Having just taken the plunge with a 5D Mark II I can really have some fun with it and my Pi 😉
I was thinking of using my Pi in my own project, to take panoramic pictures with a DSLR and the Pi also controlling both the camera and a servo to move it incrementally – so I will be watching your project with interest.
Nice project. I was thinking of something similar ever since I got the PI but never got around to doing it – shame on me 🙂
I was curious how you linked the gpio pins to the camera, can you post a small detail of the circuit ? Thanks!
There’s info here on how to drive an open/closed circuit http://davidhunt.ie/?p=2718. Just take out the motor and 12v power supply! 🙂
Wouldn’t that leave the circuit incomplete? I’ve seen many circuits for canon cameras using relays but I was wondering if a gpio->transistor->camera would work and your mention spiked my interesest…
When GPIO pin is 0v, circuit is open. When GPIO is at 3.3v, circuit is closed. Perfect for driving shutter release (or motor). 🙂
have you heard about mk802? similar to gumstix but cost the same as pi (when case and wifi is added) its way more powerful and smaller and has wifi included. also runs on linux, being more powerful it could speed up things heres a comparison between raspberry pi and mk802 http://www.youtube.com/watch?v=xbbfyWmmsKE what do you think David?
have you heard of eye fi?
http://uk.eye.fi/products/prox2
Introducing the Eye-Fi Mobile X2 Wireless Memory Card
Ya but the higher end DSLRs use CF, not SD.
Not True the 5D III has CF and SD, I use an eyefi card with it….
eyefi cards are not reliable and are VERY finicky.
pick up eye fi for £20 SanDisk Eye-Fi 4GB Wireless Memory Card
http://www.amazon.co.uk/SanDisk-Eye-Fi-Wireless-Memory-Card/dp/B005LFT44M/ref=dp_cp_ob_computers_title_2
fraction of price and weight and faster…
and i checked your camera is compatible… what you think?
This is the perfect DIY project ! Awesome !!!
Just wonder if it’s possible to make the Seagate GoFlex Satellite WiFI harddisk, talking to the Rasberry via the WiFi dongle ? Send and receive files.
David, when are you going to release the first software for this project? I’m looking forward to follow this project.
//Leif, Sweden
Love it. I had been wanting to do something like this when iPad so I could show my customers their photos while they are ordering but it wasn’t to be. The solution was so cumbersome and only allowed transfer after the shot and the had to connect and upload after each session. Then transfer to another iPad with an app. To slow a solution. This is what I need. Would a 9v battery give a longer longer run run time? Congrats, great work.
have you tried eye fi? its everything you want done but no need to DIY and its cheaper on amazon!
Eye-Fi si not supported in SD-CF adapters. I’ve had poor results when I tried. Also, this is intended to do soooo much more than just wireless tethering. 🙂
Dave,
Been thinking about programming something similar but I was a little concerned with the speed of the Pi. If something like this were making a timelapse and saving photos remotely, doesn’t the Pi have a long lag time between photo captures that would make using it fairly unacceptable?
As two examples, sharing USB ports or the 100t network connection strikes me as fairly slow and could induce undesirable lag. I’m curious what your thoughts are before some of us invest…
Thx
I would certainly intend to use the GPIO port on the Pi, and leave the images on the camera. I guess it all depends on what the shortest interval you need between shots. Of course once it gets below the minimum transfer time of images remotely, you have to fall back to the camera storing them, with later download. That’s not to say that you could drive the time-lapse via GPIO, and then when that’s finished, download the images. It’s very programmable, and can be set up in a way that suits your use case, rather than forcing you to use a pre-designed solution that might not.
That was really helpful- thanks!
Nice job with this project.
Hi David,
Finally I got something very usefull for my pi and my d700.
Thanks a lot for watering our lips with this very clever project!
As a perfect noob (at 47 it’s too late for changing that …), I’m stuck with the shopping list : ok for a “meike” or similar 2nd source battery grip. but where have found the tiny usb cable ? and by the way, don’t you think that both ends can be right angled ?
for the Pi battery, I’ll look toward lipo one, the ratio weight-volume/power is excellent.
For the software side, obviously time-lapse + upload images on another storage ++ see & take pictures from a distance would be top-notch. In this domain i’m just a copy&paste mind, so (in the near future …) do you will share your scripts?
PS : number of reactions to this project is completely crazy : maybe it’s corresponding to something *real* to do with the Pi?
David: Re having to reset the USB port as it seems to lock up on you. I seem to remember reading somewhere else that if you pole the Canon too frequently it gets all confused and sulks! You have to then either un & reconnect the USB link or turn the camer off anf on again. As I understand it to each transaction made to the Canon it responds with between one and three return transactions, so if you send another transaction before the camera has had time to completed it’s previois response it will get confused. I’m guessing this is what you might have unintentionally stumbled into,
Regards
Jools
I think this calls for a 3D printed battery grip customized to house the Raspberry Pi and batteries etc.
The tricky part i guess will be designing the connectors so that they are easy to DIY after printing the grip body…
I’ve got a 500D, a spare Raspberry Pi and a semi functioning MendelMax (still needs some tuning). I think i’ll start taking some measurements and sketch something up in openscad… Combined with magic lantern this should make for a real übercamera.
If you make a grip also for Nikon (D90) and put in the market, I’ll buy it… great project and good intuitions… keep up the good work!
Sorry… i forgive to tell you to start a project with KICKSTARTER and make live this project asap!
I just made one out of EOS 20D grip. Fully working with edimax adapter EW-7811Un, powered by BP-511 batery with 7805 voltage regulator. The only thing left is to put larger battery in smaller grip and start on gphoto2 🙂 I would also like to add some buttons for running scripts and battery level indicator.
Very cool stuff!
Would love the scripts you are using as well.
very cool project, just came across this, this morning. its a great hack for the DSLR and a excellent use for the Raspberry PI. look forward to seeing what comes next. if you could use it to control the camera form the Ipad through the wifi, i think that could bring this project full circle.
Fantastic, I’ll be watching this space to see how it develops. to many comments to read through, but have you considered using the pins inside the battery grip? There are 2 sets of 10pins in there and there is the “extension system terminal” on the base of the camera that the actual Wifi system uses? I would assume this could be heaps faster than using the USB. But a whole new ball game to work out.
This system is fantastic nonetheless and could be a more professional way to record GPS and append to images on the fly.
Keep up the good work!
Thanks for the comment. Matt! I’ve tried to find some information on the extension system terminal you mention, but I cant find any information anywhere on it. So I’m initially looking at using the USB as a more cross-platform solution, as most dslr’s have a USB port that you can talk to from the Pi.
I’m amazed at the amount of people urging you to consider a kickstarter project.
Open source people!
However…. perhaps you could do both. ??
The hardware is cheap enough already, and the software could be open source, which would certainly garner more interest and help things move along a lot quicker in regards to features and bugs
You could package it all together to sell in a “bolt on” product that fits onto a hot-shoe, or a bracket off the tripod mount hole.
On another note… what is the possibility of controlling focus dot position over usb?
I want to get one of these, but my mother won’t allow
me!, annoying
After I originally left a comment I appear to have clicked the
-Notify me when new comments are added- checkbox and from now on whenever a comment
is added I get 4 emails with the exact same comment.
Perhaps there is a way you are able to remove me from that
service? Appreciate it!
Kate, I’ve investigated this and can’t seem to remove you from the comments. I’m not sure I can do it from this site. You may be able to manage your own subscription from subscribe.wordpress.com. I think the comment/blog subscriptions for wordpress are managed from there. Sorry for the inconvenience. Dave.
Hey David!
This ist the greatest DIY-project I have seen a really long time! Does it give new Updates?
It’s amazing that you build a WFT for only ~120$.
I had the same idea when i saw the Raspberry Pi the first time and then I found this post.
Will this project get opensource or commercial?
Both alternatives are great because this is the most comprehensive project for connecting a DSLR to the iPad.
Greatings,
Buck
I need that. Really :D. Going to 3d-print some case, put some RPi inside it with some battery, and code some perl/bash/python/whatever script. I’ll try to add a 5 buttons GPIO and some small LCD display in order to be able to select scripts I want to use for shooting. Either HDR, Panorama, or whatever I may want.
I’d love to see this extended to be able to add usb based sensors, sensors to trigger the camera such as light, sound, maybe another trigger for a off shoe flash but the timing would have to be accurate.. and I was thinking a interface controlled by VNC so I can control it via my android phone or a PC, any of that sound too far fetched.. it’s basically what the camera AXE is but cheaper? and more adaptable and would easier to setup with a GUI then the LCD screen
Heya! for sensor-based shooting, you may want to look at this project : http://www.photoduino.com/ – they controle the camera through its standard remote system, with an arduino – this means events are pushed, not pulled from the system, which allow real-time actions.
Great idea, really! How do you send the picutres to your iPad? FTP?
Yes, FTP. Shuttersnitch has a built in FTP service.
Do you use gphoto2 to trigger the FTP script, or are you monitoring a directory with something like incron?
If love to see your monitoring script if your willing to share.
I think Shuttersnitch acts as FTP server, you then mount ftp share on raspberry and then you go to that directory and start gphoto from there. As gphoto automatically downloads photos to directory it was started from. I havent been able to start gphoto at random location and point to share i got some error. I use sftp service on jailbroken ipad.
Hi
Nice work!
Have same problem with USB (plug/unplug), can you please share which app/code did you use to override such action?
Thanks
The code to reset the USB port is shown in the following thread on the Raspberry Pi forums.
http://www.raspberrypi.org/phpBB3/viewtopic.php?f=28&t=23544
Regards,
Dave.
Nice idea with battery grip! I have had similar idea but finally I used mk802 mini PC. Look at http://www.photocamcon.com/index.php?entry=CamCon-MK802-wireless-photography
This could be also useful. It uses a MK802 mini PC and can be controlled even through WEB interface http://www.photocamcon.com/index.php?entry=CamCon-MK802-wireless-photography
Hoorah!
All credit to you… why Canon haven’t done something like this yet I don’t know. I’ve been waiting for canon to produce a camera (like the 5D) that you can control from a smartphone for about 2 years now. Instead we get over priced wi-fi grip and lame remote shutter devices.
because there is no update for camera pi since 08/2012 and to pass some time until official release of David Hunt’s cameraPi i worte a short script for wireless tethering. not that great how David Hunt’s script will be but it does what has to do, you find it here: http://bit.ly/ZPHdod
Hi, I want to do a project that also need to access the SD Card in a Canon (in my case it’s a 550D, a “Rebel something” in the US). My goal is to be able to plug the camera on the raspberry pi, plug an usb harddrive, and that the Pi automatically copy all files to the hard drive. The issues is: I am stuck with the camera that does not mount, I can see it using usb-list, but I see nothing relevant in /media nor in /dev/ (I see only the memory card of the raspberry).
fdisk -l doesn’t show anything either
syslog gives me the output below :
Jan 20 13:26:09 raspbmc kernel: usb 1-1.3: new high-speed USB device number 6 using dwc_otg
Jan 20 13:26:09 raspbmc kernel: usb 1-1.3: New USB device found, idVendor=04a9, idProduct=31ea
Jan 20 13:26:09 raspbmc kernel: usb 1-1.3: New USB device strings: Mfr=1, Product=2, SerialNumber=0
Jan 20 13:26:09 raspbmc kernel: usb 1-1.3: Product: Canon Digital Camera
Jan 20 13:26:09 raspbmc kernel: usb 1-1.3: Manufacturer: Canon Inc.
and after one minute of inactivity, the Canon gives up and USB is disconnected
Jan 20 13:27:10 raspbmc kernel: usb 1-1.3: USB disconnect, device number 6
any idea ?
I have the same camera (canon 550d) and managed to transfer my shots triggert by gphoto2 to a “waiting” ftp-server on an android tablet. In your case, i think, you just have to copy you photos to the connected hd when gphoto react (or triggert) by the taken shot. I read somewhere (Sorry) that you cannot acces to the sd-card in the camera directly. I can send you my scripts if you can’t get on, as a last option, but it helps you, as it did to me, much more by trying it for yourself this way. It took me as a beginner quite long to set up the needed permission, but lastly it was realy wearth the effort. when you succeed you steped over any problems that occur and know now how to handle them. good luck.
Thanks for your post. If I understand well you did manage to transfer your shot, but not with the SD Card into the EOS right ?
sorry? (also for my bad english) but when i understand your question right – with gphoto you can “catch” the pics before they where saved on the sd-card or after they had saved to the it, depends on if you neede them on “both” places. and then handle them as needed.
No in fact I am not using any interface, hence no gPhoto. I am going to use the raspberry pi for a very simple use : I plug a hard drive, I plug the camera, no screen display, and it should just save the camera files to the harddrive so that I can empty the card and shoot again. I managed to do this with my GoPro, but the EOS’s SDCard is not mounted. Maybe you are right and this is not possible.
this project is amazing!!!
this really opens up possibiltys. the top feature that could be amazing is adding in the capturing of uncompressed hdmi feed. this is possible on the Nikon d800 with an expensive add on.
i would really like to see the finished product, and implement it myself !!
This is amazing, I have all the hardware needed but am totally clueless regarding programming and would not know where to start. An idiots guide to getting this going as and when you feel is stable enough to release would be superb. Top work!
If the wifi dongle can act as a hotspot, you could very well buy a box of those new 10$ wifi-to-serial chips from TI and make all sorts of automated camera accessories like a servo controlled crane or something.
Do you do anything special for RAW files or do you just transmit them as-is? Or perhaps you shoot in JPG.
I recently received a Raspberry Pi and was thinking it would be handy when my husband and I travel if I could connect the camera to the Pi and it would send the images over WiFi to some sort of online storage, without the need for a laptop. I typically shoot in RAW.
David, Happy St. Patrick’s Day from a son of a Kerryman!
Inspired by your method, I’ve attached a UG802 Android Hdmi stick powered by a 4xAA battery pack to my Canon 500d hotshoe. The UG802 runs VNC server at startup through a Tenda-3G150B-Portable rechargeable router. I connect to the UG802 from my Ubuntu Netbook, Ipod Touch or Ipad by VNC client and then run Android DSLR Controller from either of these devices. I can then set and activate the Canon remotely, the app permits live camera preview, shots are stored on the camera.
View my setup at:
http://www.flickr.com/photos/74732770@N00/8566052492/in/photostream
Well done David, this is a great idea. I have a question for you or anyone reading these comments. I have a 350D canon and my question is whether I could use a 5D battery grip to attach to my camera? Since you have removed the part of the grip that inserts into the camera’s battery compartment, then it would seem to me that your grip can attach to any camera with a tripod screw hole? I realise that the overall shape and fit of the 5D grip would not match my camera particularly well….but if they can connect together adequately then I’d be happy. Thanks in advance for any answers to my query!
I’d recommend you take a look at a 5D Grip to see if the thumbscrew is in roughly the same place. There’s also a small pin that sticks up into the camera for stability, you can cut that off with a snips. It might look a little big, but should do the job fine…
i managed to put a rpi into the grip of an eos 550d. arent they almost the same size?
Thanks David and Ojanssen for your replies.
Ojanssen, I’ve just seen your previous posts regarding the fitting the RPi into an 550d and I think you’re right that is is almost the same size as the 350d (need to check this with my friend’s camera). I see that due to the restrictions in space you’ve not been able to integrate a battery. I’m thinking at this stage that I’m more likely to go down the 5D-grip route so that I can fit a bettery inside too. At some point in the next few years I’ll probably upgrade my 350D to another (most likely larger) model so I guess the battery grip size difference will be less in that case.
David, I was wondering if you (or anyone reading this who has a 5d battery grip) would mind giving me a few measurements of the thumbscrew positioning? This would be very helpful to determine where the grip will be positioned on my (or anyone’s) camera. With Jessops closed, it’s a lot harder to see camera equipment in person!
BTW, I’m only just getting up an running with the RPi, but if I get to the stage where I come up with anything nifty I’ll be sure to share!
omg, just take my money 🙂 let us know when you are on kickstarter. do you have a facebook page ?
Hi David,
Great stuff indeed !!!
I hooked my Pi to a Nikon D2x and get the command –capture-image-and-download working ok. But I don’t know how to download this photo from the camera to the Pi SD card or to my USB connected HardDisk.: The New file is in location /store_00010001/capt0000.jpg on the camera . How can I retrieve it? Thanks for your help.
best
Laurent
Really useful – Thanks. FOr an alternative to the perl script mentioned. you can use gphoto2 hooks . Details are at http://spendiff.com/archives/140
Cheers
Great project.
A Note about it, with attribution, went to my Blog:
http://faz-voce-mesmo.blogspot.pt/2013/07/um-pc-raspberry-uma-camara-raspy-imanes.html
Hi Daveh, great looking project you’ve got going on. Could this type of set up be used to upload images as they are taken to a webserver/sent in an email?
I have a camera that is situated away from wifi/power etc so I cannot connect and transfer data that way.
Basically, I’m trying to replicate the Canon WFT-E2 II Wireless Transmitter but in a DIY and open source environment with a fraction of the cost.
Chris