Salon Gold Medal at Trierenberg 2012

Just under three months ago I started entering FIAP salons. These salons are basically photo competitions in which a certain percentage of the entered images are ‘accepted’, and a smaller percentage again are awarded medals. So it’s an very satisfying to have an image accepted.

  • From Wikipedia: FIAP is the Fédération Internationale de l’Art Photographique,  (Eng. The International Federation of Photographic Art), and is an international organization of national associations of photography. More than 85 national associations are members, comprising nearly one million individual photographers.

Continue reading “Salon Gold Medal at Trierenberg 2012”

Real-Time Photo Reviewing (Tethered Shooting)

I recently did a shoot where I was shooting macro shots of precious gems. Each shot needed to be reviewed for focus, clarity, dust spots, etc before moving on to the next gem. The preview screen at the  back of my Canon EOS 5D Mark II is normally a great screen, but just didnt cut it in this situation, when more than one person needs to look at an image to approve it or bin it. I needed to be able to get the images onto a full screen device quickly for preview. So, I looked into various forms of previewing images on a full screen device (PC, laptop) as they are being taken, from card swapping to usb tethering, to wireless tethering. Here’s the list, followed by a description of each method with the pros and cons of each. Continue reading “Real-Time Photo Reviewing (Tethered Shooting)”

Evening Drive to the Clare Coast

Well, the evenings are getting longer, and sun is setting around 6:25 these days. With this in mind, I had a quick drive up to the Clare coast to see what kind of time I’d have on the coast to grab a few shots before going home for my dinner. I left work at 5:25, and by 6:15 I was parking at the beach near Quilty. The sun was just about to go down behind a bank of clouds, but I managed to grab this shot before it disappeared completely. Continue reading “Evening Drive to the Clare Coast”

Major Ink Longevity Research Programme now FREE

I just got the following great news. Mark H. McCormick-Goodhart, Director of the ink longevity research programme at http://www.aardenburg-imaging.com/news.html has just announced that the subscription fees to the website are being dropped, making all the research available to everyone for free. I’ve been a member since the very early days, and found in invaluable as a printer in selecting (or ignoring) third party inks for use in my printers.
I’m actually in the proud position of having the WORST EVER performing sample in that programme. An Ink I played around with in the early days was a dye ink off eBay called “Signal Inkjet”. I got one batch of 600ml (6x100m bottles), which cost me $10. It seemed ridiculously cheap, and sure enough, the results matched the price. The prints were only good for a few months before visible fading and colour shifting kicked in. Once I saw the results coming out of Aardenburg-Imaging, I quickly switched back to Claria OEM inks (I was on a dye printer at the time) which was showing much better results.

I eventually got and Epson R2880, and as a result of this research, I settled on Inkjetfly inks, as they have longevity and colour gamut approaching that of OEM inks for a fraction of the price. I’m printing all of my on photos now (and also for some friends, club competitions, etc.) and we’re very happy with the results.

Also, if you’re interested in the research, you can also submit your own samples. It’s very interesting to see your own samples put through the light-fade tests, and you can be confident that the results are accurate and measured in a way that can be compared consistently with the other samples under test.

Have a look at Mark’s website, and take a look at the longevity test results. It lists a huge amount of printer/paper/ink combinations, invaluable for someone who’s looking to use third party inks at either an amateur or professional level.

Flash Full Power Recharge in around 3 Seconds

I’d been hearing good things about various types of battery packs recently, quantum, etc. Being the diy enthuasist (cheapskate) that I am, I thought that I’d research building an external battery pack for my strobes. These usually take the form of a 12v battery pack which connects into the external port of the flash (Canon’s, in my case), reducing recycle time, and giving longer battery life, depending on the type of battery used. I looked initially at the Canon pack, which takes 6 AA batteries. These come in at well over €100. I had a look around on Flickr and other sources, but nowhere could I find a circuit that would feed this external port on my Canon flashes.

Anyway, I had a look on eBay for some canon knock-offs, and I spotted an “iShoot” model for €23 (incl shipping from Hong Kong), which takes 8 AA batteries,  so I ordered one. It duly arrived, but unfortunately  it was DOA. The LED on the unit would not illuminate, and I saw no change in the recharge time of the flash. I contacted the seller, and he was really great about it. He said that the shipping back to Hong Kong  was quite expensive, so I could keep the faulty unit, and he would ship me out a replacement. That arrived about a week later.

Better this time. Upon plugging it in to the flash, and powering the flash on, the LED lit up on the battery pack. With fully charged NiMH AA’s, I was now getting recycle times of just under 3 seconds with the flash set to full power.

I had a look at the internals of the faulty unit, and with the complexity of the circuit board I was looking at, there was no way I would be able to replicate that in a DIY fashion. So the easiest thing for me to do was to just simply order one pack for each of my flashes. At €23, that’s not too expensive, and certainly a lot cheaper than the Canon units. I used this unit over the weekend, and popped off several hundred shots at 1/4 power, and was still getting very fast recycle times. I’m definitely going to order more of these units for my next strobist shoot.

Useful Photography Tools #1 (ViewRanger GPS)

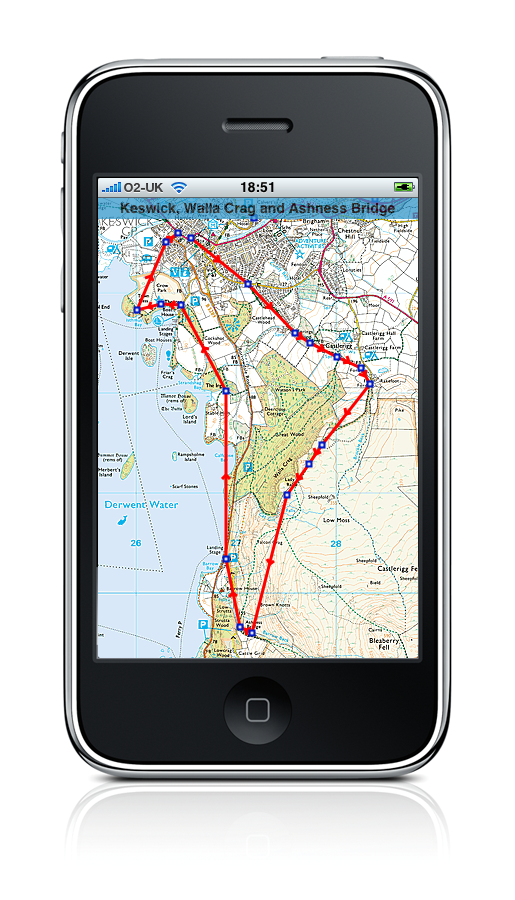
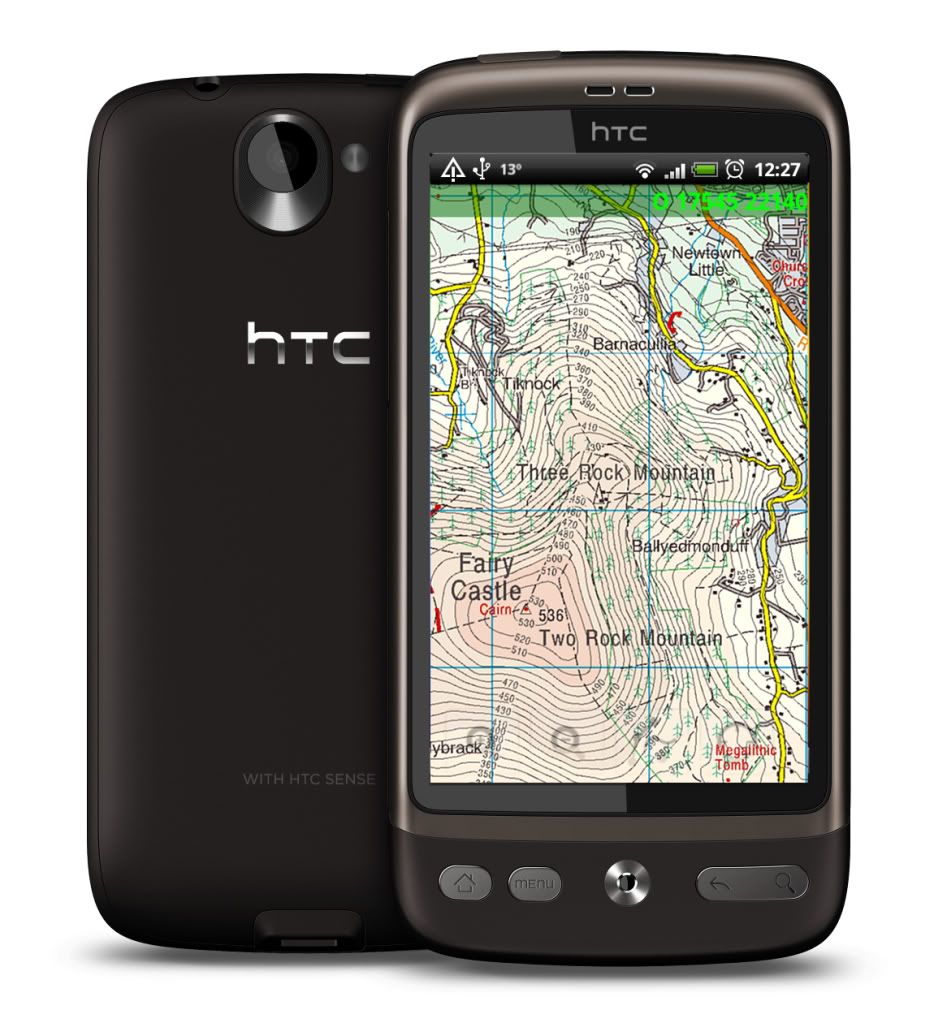
I’ve been using ViewRanger on my smartphone for about a year now. ViewRanger is a GPS application that allows you to download maps onto your phone, and then use them to plan trips, guide you around an area, all the usual stuff you do with a GPS. The nice thing about ViewRanger is that they’ve licenced the maps from Ordinance Survey Ireland (OSI), so you can get the 50000:1 (Discovery series) in a variety of delivery options. I initially bought the app and a “tile pack” for about €20, which lets you download small portions of Ireland on-demand. This is very handy when you’re planning a trip to a particular area, in that you can download the tiles for the area ahead of time. However, if you want to be completely flexible, you can get all 26 counties of Ireland for €150, and Northern Ireland for a further £40. This has the added advantage that when you’re out and about, you don’t need to download any data over the 3G connection, saving you data charges, and works well in remote areas where there’s no data connection available. I got the 26 counties recently, which came in a 1.1GB zip file. Uploading to the phone was a breeze, and once the registration key was entered I could zoom into anywhere in the 26 counties with 50000:1 detail.

The maps, as everyone who’s ever used a Discovery Series map knows, contains a tremendous amount of detail. They have all the contours, roads, Holy Wells, Promontory Forts, etc etc. Also, all the back roads that you’d ever need to get as close to the coast as possible if you’re into coastal landscape photography. Some of the roads shown are so small as to not be drivable. To have this level of detail available on your phone is a great aid to the Irish Landscape Photographer. I’ve found some great new areas (new to me, anyway) using ViewRanger. It’s also great to use in conjunction with The Photographers Ephemeris (TPE) to plan sunrise and sunset trips, as TPE uses Google Maps which requires a 3G connection and does not have the detail contained in the OSI 50000:1 maps. I’ll probably do a small article on TPE as a follow-up to this, as it’s another very handy tool for photographers.

If you order ViewRanger for the iPhone, you need to go through the app store, which will cost you €20, but that comes with a pack of tiles for the country of your choice. For other phones, the app is free, but you pay seperately for the map packs. Tile packs are about €20, individual provinces are about st£60, Northern Ireland is about st£40, and WholeEire.zip will cost you st£120 (€150).

I initially started using ViewRanger on a SonyEricsson Satio touchscreen smartphone, but then got and iPhone 4. ViewRanger support were very quick in helping me move my licences from the Satio to the iPhone at no extra charge.

For more information , see the official ViewRanger website at www.viewranger.com.
(Images used with permission)

USB 3.0 is the Future

From reading this blog, you might get the idea that I’m obsessed with disk speeds as of late (on the cheap, I might add). Well, you’re not wrong there. And to add to my obsession, I got my hands on a USB 3.0 PCIExpress card and a SATA-USB 3.0 atapter today. After installing the drivers for the card, I then attached a SATA hard drive to the adapter, and plugged it into the PC. Up it came no problem, so the first thing I did was to run ATTO Disk benchmark tool against the drive. Here are the results:

Sustained 80-85MB/sec read/write. It sure beats the hell out of USB2.0, at about 25-30MB/sec.  I don’t have a decent drive available to test it faster, but theoreticaly USB3.0 is good to >400MB/sec.

Next purchase will probably be a USB3.0 Compact Flash reader, but they’re very thin on the ground. Oh, and some good and fast Compact Flash cards to go along with it. 🙂

UPDATE:

I got a new motherboard, which has USB 3.0 built in, and this week Aldi were doing a special on USB 3.0 1TB drives for €79.99. I got one, and the following is the ATTO benchmark results:

Battery Grips = BAD?

While I was out recently with my 5DMkII, Manfrotto 458b tripod with 486RC2 ball-head, I noticed that the strong wind was shaking the camera a lot. I looked a bit closer at the setup and it seemed to me that the weak point in the above setup was not any of the parts mentioned, but the 3rd party battery grip I was using on the camera. It’s not the offical Canon battery grip, buta cheap alternative I got of EBay for about €50. When the lens (24-70L) caught the wind, I could see it shaking up and down. The camera body seemed solid, and the tripod head was barely moving, but there was still a shake visible at the end of the lens. It looked to me like the weak point was the battery grip. So, the next time I went out, I took off the battery grip, and screwed the tripod plate back onto the camera and left the battery grip at home. In similar conditions, I could hardly see the lens shake at all this time. Less camera shake, as we all know, means sharper images, and I was much happier with the images from the second outing.  Looking closer at the battery grip, it seems solid enough, but when I grab each end and twist, I can see the plastic deform slightly. So the force of the weight of the camera when on the grip, then on the tripod was enough to warp the grip slightly to allow the shake.

Next time I’m in the camera store, I’ll check out the official Canon grip. I’m sure that’s made from much sturdier stuff than the cheap knock-off alternatives…

So from now on, when I go shooting landscape, the battery grip will stay at home.

800 Years of Limerick, from King Johns to the Clarion…

I had a walkabout around Limerick the other evening. John Hickey (another local photographer) and myself took a stroll around to see what we could see. The light was wonderful, so just about sunset we went into the Strand Hotel and asked at reception if we could go up to the top floor. Thanks to the very nice person on reception, who checked with the boss in the back room and up we headed.

As the sun went down there was a lovely colour to the sky over Thomond Park, the local rugby grounds.

A while later, once the sun had gone down, we move to the other side of the building, and I set up my tripod on the very edge of the balcony, and took a series of five long-exposure images (about 15 seconds each). Stitched in PhotoshopCS5, and the GuyGowan retouch action applied (Yes, I subscribed to the website), plus a few more retouches from myself . I like to call this one “King John’s to the Clarion”, which covers about 800 years of Limerick history.  This is the result:

This is best viewed large.

Overall I think it was quite a productive evening. 🙂

L.I.P.F. Distinction

In April 2010, I was successful in my application of a Licenciate distinction of the Irish Photographic Federation. These distinction sittings are held twice a year by the IPF, and amateur photographers from all over the country submit panels for judging.
There are three levels:

  • Licentiate (10 images)
  • Associate (15 images)
  • Fellow (20 images)

Here’s my panel:

LIPF Panel

The process of putting the panel together is roughly as follows. The images first have to be selected. I got the help of several club members with this. We put 30 to 40 5×7 images on a large table and narrowed it down to about 15 images, then narrowed it down further to 10-11. Some images had to be flipped horizontally to make them more suitable for the panel, as the images should work together to compliment each other.
Once the final 10 images were selected, each image had to be processed, printed, and mounted. They were printed using my calibrated Epson R2880 printer. Then they were mounted. For this I used black-core mount board, and Neville Gawley was good enough to cut the mounts for me. Once the images were mounted, they were glued onto 5mm foam-core board using 3M spray-mount adhesive. This gives the  finished images strength, and are less likely to warp. The thicker the foam-core, the less warping.
The day was very interesting, as there were about 50 photographers who had submitted panels, and it was great to see some wonderful work on display. Usually the distinction judging is held on the same weekend as the IPF National Club Competion, which are also on display throughout the day. Even of you don’t have a panel entered, it’s still worth a look.