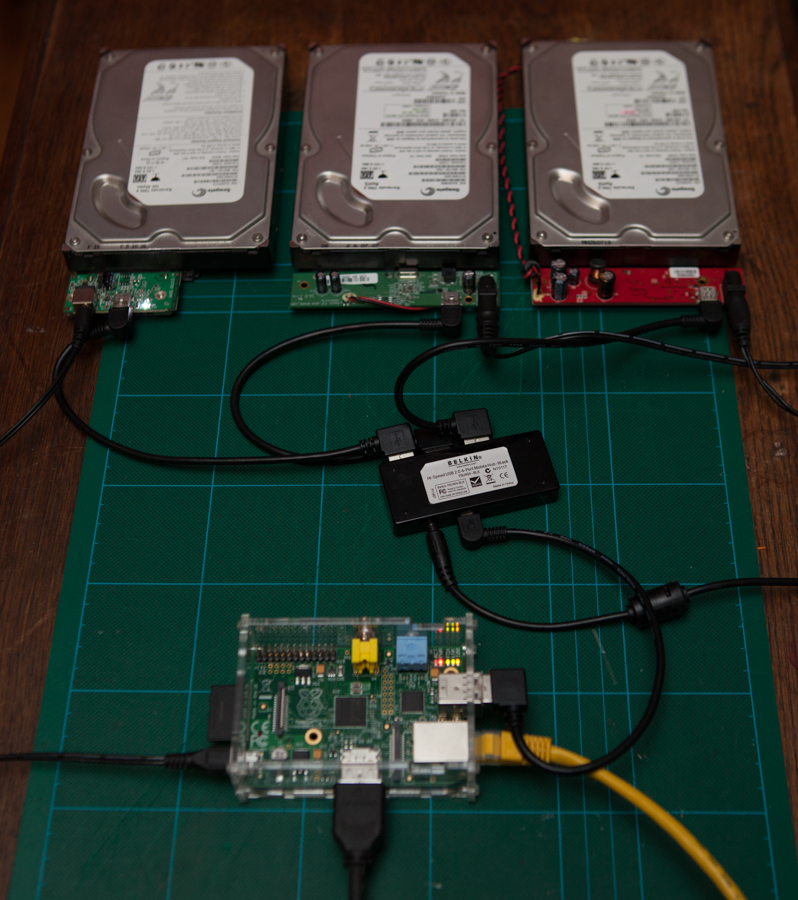
 This mini-project uses a Raspberry Pi as a RAID array controller. Now it won’t be the fastest raid controller on the planet, but if you’re only doing a bit of streaming, and a bit of backup, and would like a bit of redundancy, then this solution might be for you. OK, maybe not. The performance will be slow. Very slow. This article is not meant to be a serious solution, I just did it because I could. I did it to see if it would work. And it seemed to.
# cat /proc/partitions
major minor  #blocks  name
 179        0    7761920 mmcblk0
 179        1      57344 mmcblk0p1
 179        2    7700480 mmcblk0p2
   8        0  156290904 sda
   8        1  156289880 sda1
   8       16  156249999 sdb
   8       17  156248975 sdb1
   8       32  156250000 sdc
   8       33  156248976 sdc1
root@raspberrypi:/home/pi#
# apt-get install mdadm
cat /proc/partitions
major minor  #blocks  name
 179        0    7761920 mmcblk0
 179        1      57344 mmcblk0p1
 179        2    7700480 mmcblk0p2
   8        0  156290904 sda
   8        1  156289880 sda1
   8       16  156249999 sdb
   8       17  156248975 sdb1
   8       32  156250000 sdc
   8       33  156248976 sdc1
   9        0  312235008 md0
root@raspberrypi:/home/pi#
Check the status of the array # cat /proc/mdstat Personalities : [raid6] [raid5] [raid4] md0 : active raid5 sdc1[3] sdb1[1] sda1[0] 312235008 blocks super 1.2 level 5, 512k chunk, algorithm 2 [3/2] [UU_] [=>……………….] recovery = 8.3% (12961348/156117504) finish=184.8min speed=12909K/sec unused devices: <none> Now fdisk the new virtual disk and create the desired partition(s). This will create /dev/md0p1 Create a mountable filesystem # mkfs /dev/md0p1 -t ext3 (the mkfs will take a while) Now, mount the drive: # mount /dev/md0p1 /mnt # cd /mnt #mkdir test Raid partition created. A RAID 5 partition will survive one drive failure, giving you time to swap out the failed drive with a good one, and the array will re-build all the parity information automatically, bringing you back up to full redundancy again. Next steps, install SAMBA and share out your new partition on your network…. It’s a this stage that I tore down the setup. The array was only building at 10MB/sec. With the amount of data that I have lying around, (thousands of images from my DSLRs), it’d take ages to put anything onto this array, and almost as long to get anything off. The Raspberry Pi is not to blame in this case, it’s the fact that I’ve put all those drives onto the one USB port. OK, it’d be nice to have SATA interfaces on the Pi. But we don’t. No matter, it’s still a fantastic piece of kit. 🙂 Anyway, I thought it was an interesting exercise. –edit– If you really do want to go ahead an get something like this set up as a file server, you could use the above instructions to set up the raid array, then use the excellent guide by Jeremy Morgan to get samba set up and the whole thing available on the network. –edit– If you’re into serious speed, check out my other blog articles where I use an Infiniband fabric to get over 900MB/sec between PC’s. Now that’s serious performance! 🙂 Be sure to subscribe to the newsletter (top right) and I’ll let you know when I post any interesting new projects or updates. 🙂

Great idea, could you initially image one drive and write it onto the other two? would this reduce the build time?
Would there potentially be an issue with burning out the SD card over a short space of time due to volume of read write?
If you want to try an alternative that may be significantly faster, you can use btrfs instead of mdadm + filesystem. Using btrfs with the RPi may be a serious issue if you want it for the root filesystem, but not for an external device.
btrfs is still considered experimental, but I think it fits your goal.
I used it to build a Time Machine equivalent.
One issue can be that you used samba to transfer files to it, did you tried using FTP?
I was thinking of trying the same thing for a home raid server. You’ve saved me the bother and given food for though on the speed limitations. Thanks (from Mayo).
How about using cubieboard? It has SATA…you know what?! I just might do it! 😀
How do you know which HDD isn’t working? :/
Seriously, seriously cool 🙂